
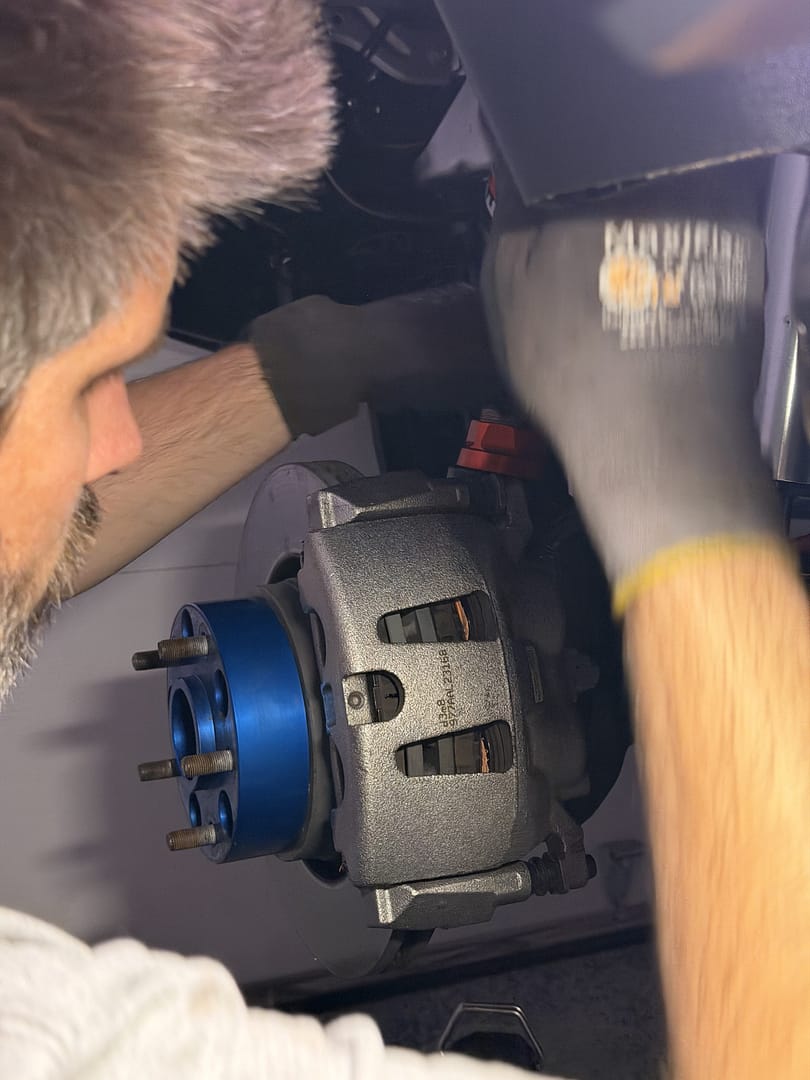
If you're interested in why we decided to install JT Gladiator brakes on our JK, check out this page here, or this video on YouTube. If you're interested in how, keep reading, or check out the install video on YouTube here. Also, at the bottom of this page, I'll include a list of tools, a table with torque specs, and all the part numbers.
Almost a bolt-on
This upgrade is basically a bolt up job, with one exception: the splash shields/backing plates. The JL-HD and JT front brake caliper carriers/adapter/brackets are larger than the JK by enough, they interfere with the splash shields. The simple fix is to simply trim them to clear the caliper brackets, so we removed the JK calipers, carriers, and rotors, then went to work. A little trick we like, and failed to photograph, is to hang the old calipers from some S-hooks on the frame. This allows us to mess with hydraulic lines later and just focus on calipers, carriers, and rotors first. This is demonstrated in the YouTube install video if you'd like to see it.
Here you can see the JT Gladiator caliper bracket temporarily installed, to demonstrate that interference, and trace out some cut lines:
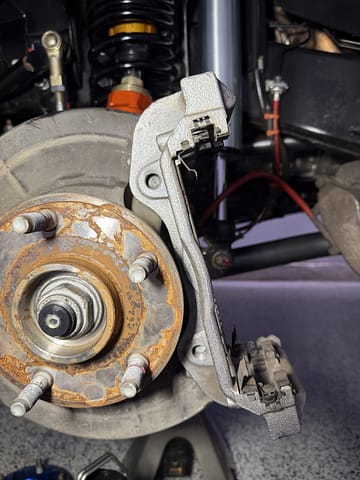
JT caliper bracket interfering with JK splash shield
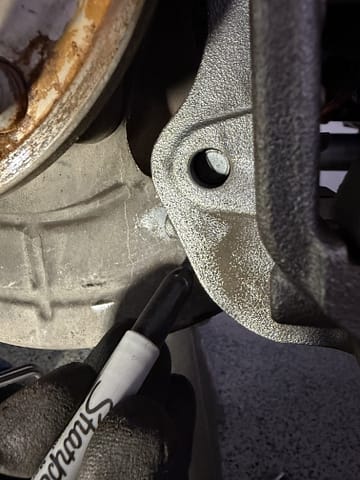
Using a Sharpie to trace a cut line
Here, you get a closer look at the interference we need to correct:
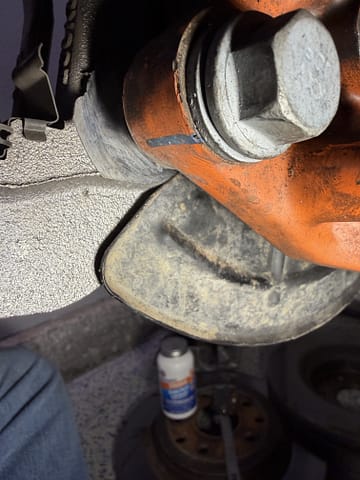
Backside of splash shield showing interference
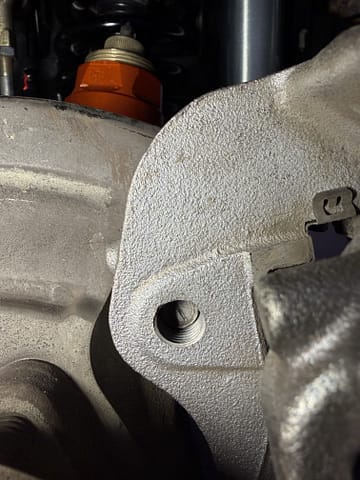
Closer look at interference at the top of the carrier
Trimming the splash shields
With the caliper carrier temporarily attached, and the interference traced out with a sharpie, we moved to trimming the splash shields. I used my Milwaukee cut-off tool, and a new favorite Milwaukee band file. This made for a quick easy trim-job that followed the intended line nicely. Here you can see the cut-lines with the carrier removed:
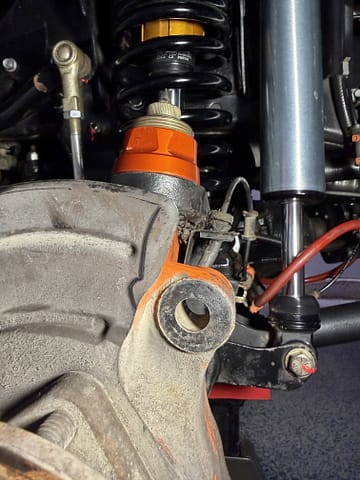
Upper cut line for caliper carrier clearance
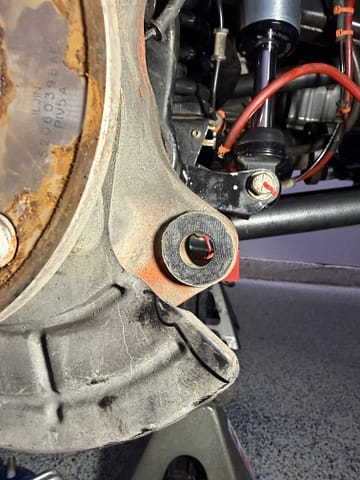
Lower cut line for caliper carrier clearance
With the cuts completed, we used a paint pen to touch up the bare metal edges. This could easily have been done with spray paint, but I'd rather not do that in an enclosed garage:
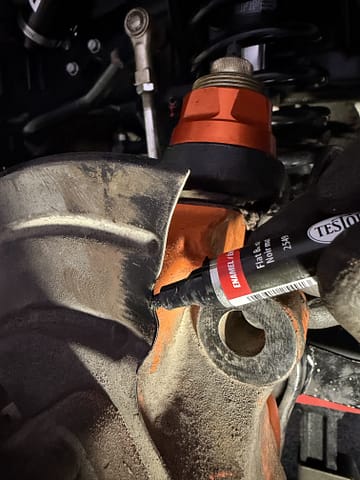
Painting completed upper cut so it won't rust
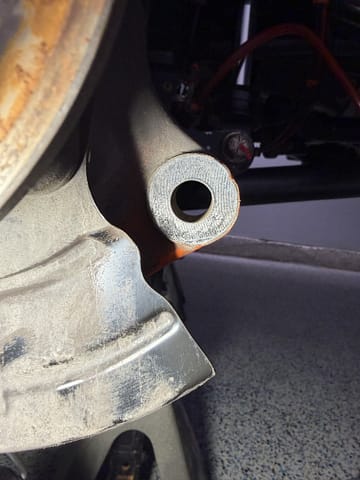
Closer look at completed lower cut
And finally, we install the caliper bracket to check for clearance:
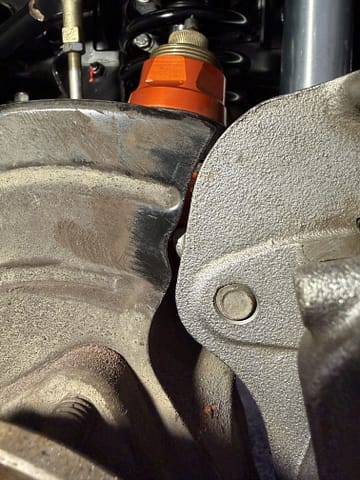
Caliper bracket now clears trimmed splash shield (top)
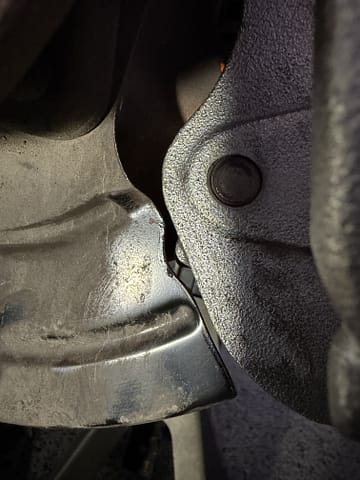
Caliper bracket clears trimmed splash shield (bottom)
Installing front JT Gladiator brakes on the JK
Now that everything clears properly, it's time to bolt parts together. While this is a simple bolt-up job from here, there are some important things to note. The first of these is the front caliper bracket bolts. The JL uses hardware that is slightly longer than the JK, and you must use the JK hardware here. If you install the JL bolts, they will touch the back of the rotor and prevent it from seating properly:
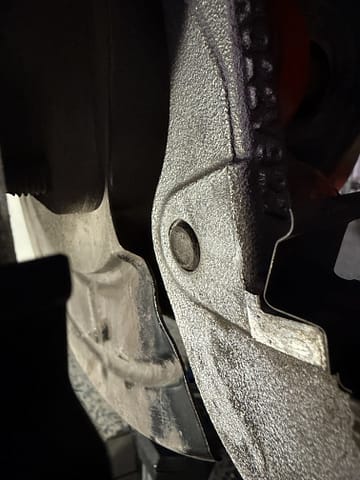
JK bolt - nice and flush with JL caliper bracket
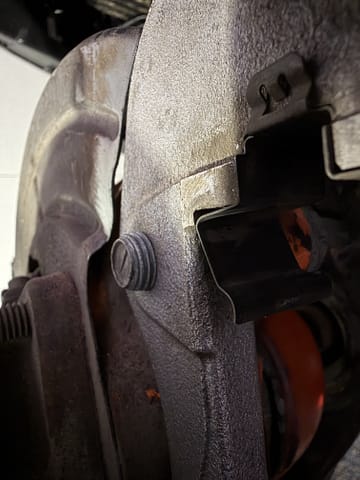
JL bolt - protrudes enough to make contact with rotor
With the correct bolts selected, it's time to put the brake rotor on, apply some thread locker, and bolt the caliper bracket to the knuckle. To make the rest of the install easier, we did bolt our wheel spacers on to hold the rotors in place too. The JK and JT factory service manuals call for different torque specifications for the bracket bolts, so we decided to go with the JT spec at 144 ft-lbs. I'll put all the torque specs and bolt head sizes in a table near the end of this page for easy reference.
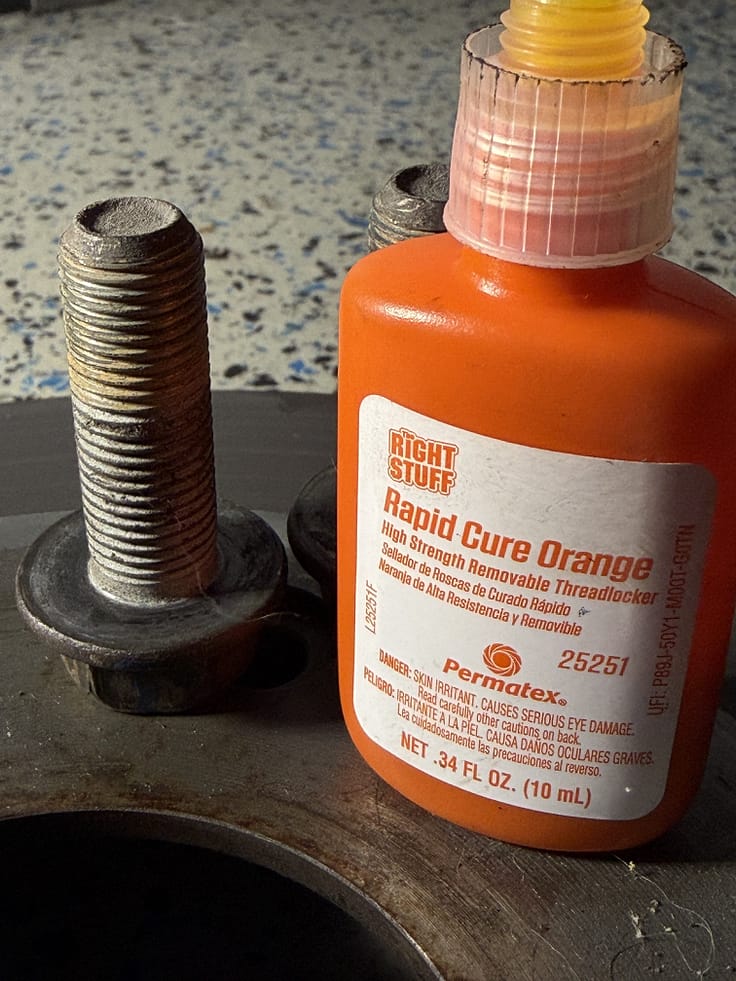
Our preferred thread locker for the caliper carrier to knuckle hardware
The next step is to lubricate all contact areas on the front caliper and carrier, then install the pads and caliper. I failed to photograph lubricating the brake pad clips on the caliper carrier, but that is also in the YouTube video if you'd like to see it. Here's lubricating the caliper:
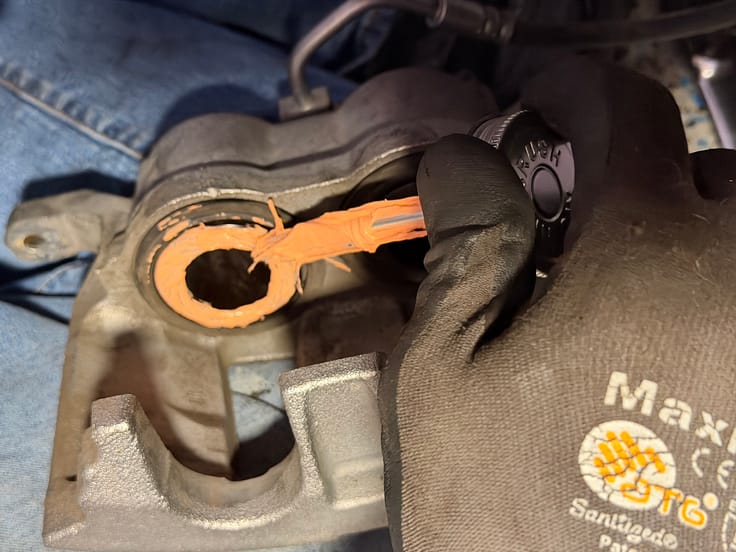
Applying brake parts lubricant to caliper pistons
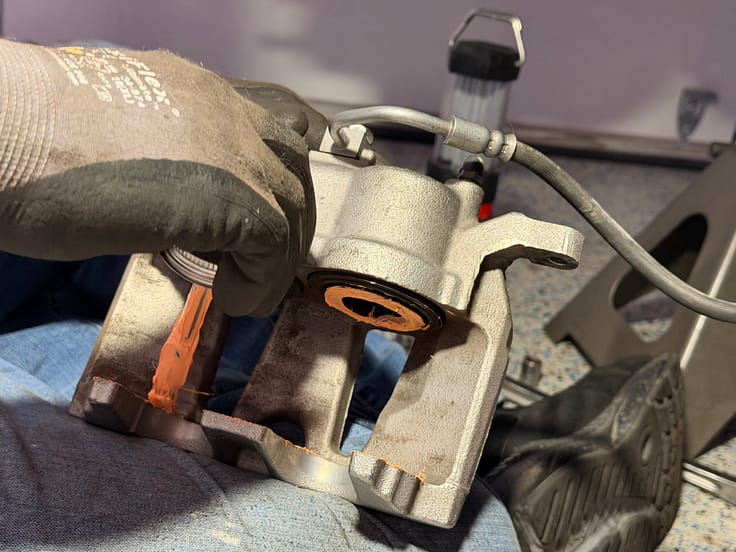
Applying brake parts lubricant to caliper fingers
And finally, here's the caliper going on over the pads.
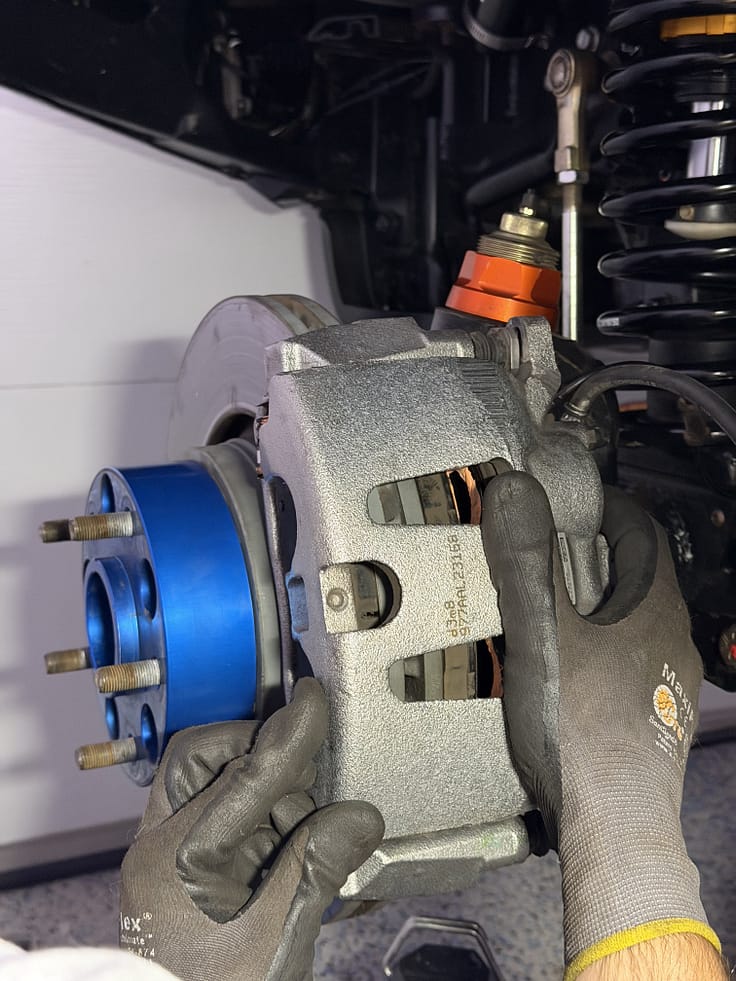
Installing the front JT Gladiator caliper on our JK
We bolted the caliper in place using the JT Torque spec: 27 ft-lb (324 in-lb). The next step was dealing with the brake line, which is a direct swap from JK to JT. It should be installed with new copper crush washers and torqued to 26 ft-lbs (312 in-lbs). Again, this wasn't photographed, but is in the YouTube video if you would like to see it. Here you can see JT Gladiator front brakes fully installed on our JK:
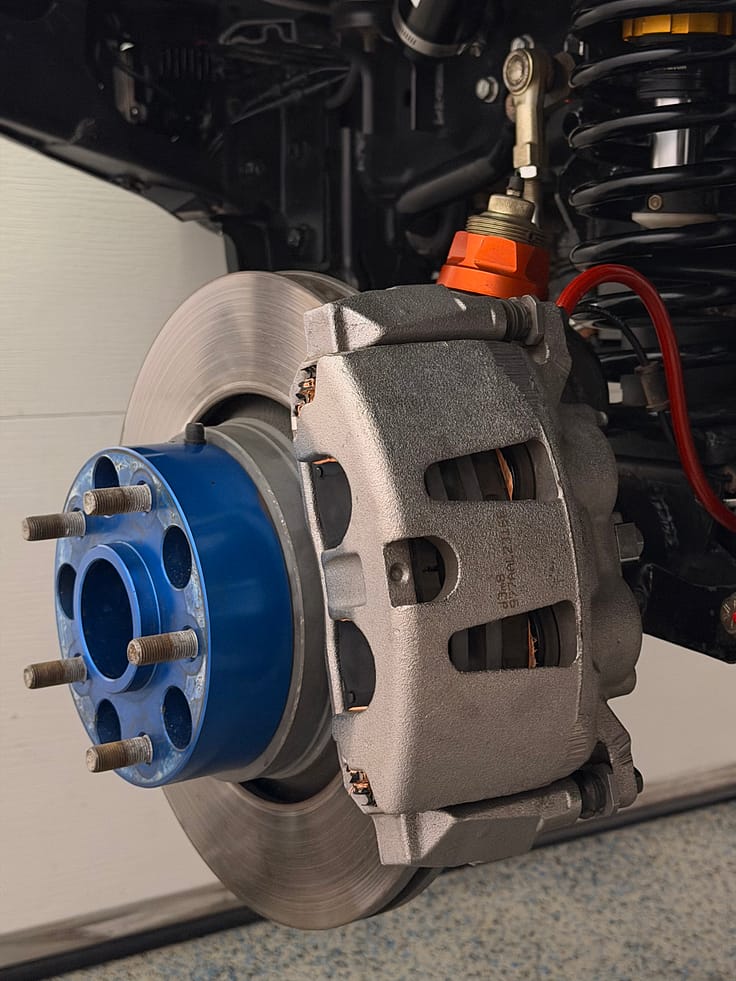
JT Gladiator front brakes Installed on our JK Wrangler
Installing JT Gladiator Rear Brakes:
The rear JT Gladiator brake upgrade is simpler than the front, as there is no trimming needed, and either set of caliper to carrier bolts will work with the JK. It really is just a bolt-on modification. I did not photograph this as it is a 100% bolt up job, and we did film the whole process for the installation video.
We simply unbolted the factory parts, and then proceeded to install the JT brake rotor, then the caliper carrier, with appropriate lubrication like up front. We again used the JT torque specs, which for the rear carrier to axle bolts is 74 ft-lbs, and for the caliper to carrier is 27 ft-lb (324 in-lb). Like the front, the brake line is a direct swap, so we installed new copper crush washers, and torqued the banjo bolt to 26 ft-lbs (312 in-lbs). Here you can see the JT Gladiator rear brakes fully installed on our JK:
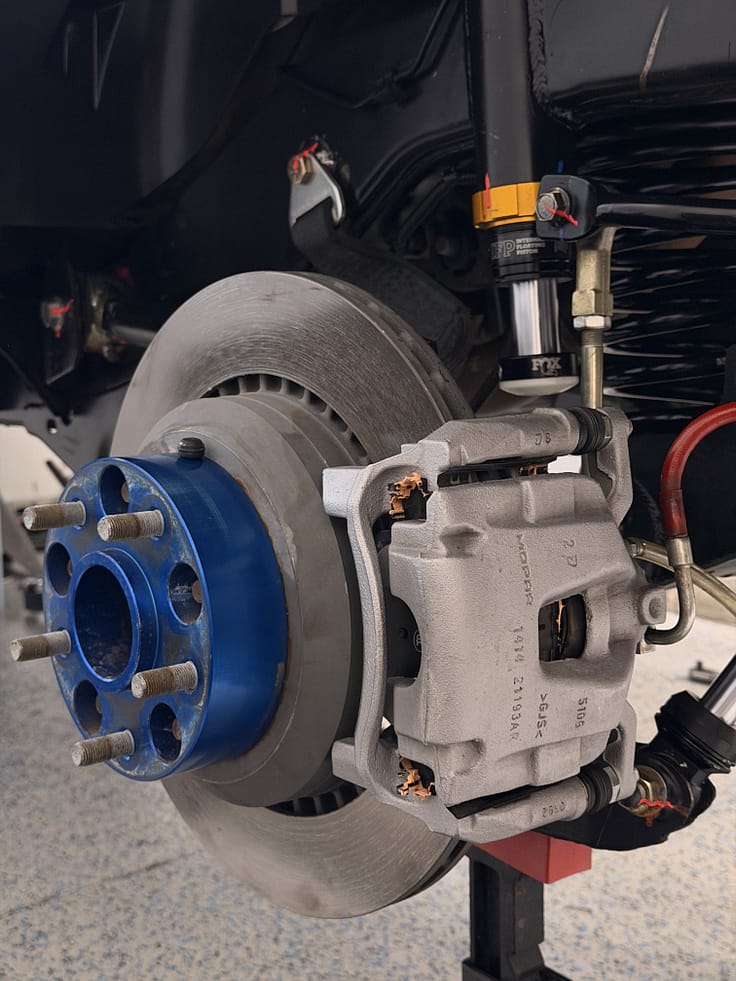
JT Gladiator rear brakes Installed on our JK Wrangler
Bleeding the Brakes
Once everything was bolted up, we bled the brakes in the conventional manner before using Jscan and OBDLink MX+ to do an ABS pump bleed for good measure. I cover both of these procedures in the video and link to all the necessary tools below.
Tools needed to complete the job:
Here is a the list of the tools we used to install this JT Gladiator brake upgrade on our JK. Wherever available I linked to the exact tools I used (Like the Torque Wrenches), or to the tool I'd rather have, and will buy when mine fails (Like the breaker bars). The Milwaukee tools are specifically linked to Acme Tools because they are an authorized retailer for Milwaukee, unlike Amazon, and where I buy most of my Milwaukee tools.
- Jscan, app used for OBD Bleed
- OBDLink MX+ Bluetooth OBD Tool for used ABS Bleed
- Milwaukee M12 Fuel cutoff tool
- Milwaukee M12 Fuel 18" Bandfile
- Milwaukee M12 FUEL Stubby 3/8 Inch Impact Wrench
- S Hooks
- Emery Cloth (strips of strong sand paper)
- Drain Pan
- Clear Tubing for bleeding brakes
- Flush Cutters
- Zip Ties
- Nitrile Gloves
- 1/2" Torque Wrench
- 3/8" Torque Wrench
- 1/2" Breaker Bar
- 1/2" Ratchet
- 3/8" Ratchet
- 3/8 Extension
- 21mm socket
- 18mm socket
- 15mm socket
- 13mm socket
- 10mm socket
- 11mm open end wrench
- 10mm open end wrench
Torque Specifications:
Here are all the applicable torque specs for this brake job. While I did torque everything to JT Gladiator values, I include both the JK and JT torque specs from the factory service manuals for your reference.
Front | ||||||
| Part | JT Head size mm | ft-lb JT | in-lb JT | JK Head size mm | ft-lb JK | in-lb JK |
| caliper carrier to knuckle | 21 | 144 | 1728 | 21 | 120 | 1440 |
| caliper to carrier | 13 | 27 | 324 | 21 | 26 | 312 |
| banjo bolt | 15 | 26 | 312 | 15 | 23 | 276 |
| Bleed screw | 11 | 7 | 84 | 11 | 7 | 84 |
Rear | ||||||
| Part | JT Head size mm | ft-lb JT | in-lb JT | JK Head size mm | ft-lb JK | in-lb JK |
| caliper carrier to knuckle | 18 | 74 | 888 | 18 | 55 | 660 |
| caliper to carrier | 10 | 27 | 324 | 18 | 26 | 312 |
| banjo bolt | 15 | 26 | 312 | 15 | 23 | 276 |
| Bleed screw | 10 | 7 | 84 | 11 | 7 | 84 |
Parts:
I cover all parts for this job in the page about why we chose to go with Gladiator Brakes instead of any of the available kits, but I will include them here as well. If you haven't read that yet, or watched the video we did on the various options, Just know there are multiple JL/JT brake packages, and we installed the largest of them. This install and the JL non-vented rear install are essentially the same, and they both use the same 12.99" front brakes. Parts for both versions are included below. We'll cover the front brakes once, and then provide the details on both rear brake packages separately.
Most likely you'll find used JL/JT calipers/adapters and want new pads/rotors, so I've broken each list into 3 parts. The first is the pad/rotor options I'd use if mine weren't almost new when we did the install. You'll find options there for just one end of the rig, and kits that do both front and rear. I've had very good luck with PowerStop parts in the past, so that's what I've linked to. The second is the consumables needed for the job - including the exact parts I used. The third is the OEM MOPAR part numbers for everything involved.
JL/JT Big Front Brake Parts with 12.99" Rotors
Here's the part numbers for everything you'll need to do the front brake upgrade:
Front JT/JL Sahara/Rubicon (12.99" Vented rotors) | P/N: | Qty | Amazon | Summit Racing |
–––––––––––––––––– Pick one based on your install needs: –––––––––––––––––– | ||||
| PowerStop pads/rotors/boots/clips package – Front Only | K7940-36 | Pad/Rotor Kit Front Only | Pad/Rotor Kit Front Only | |
| Complete PowerStop pads/rotors/boots/clips package – Front + Solid Rear Rotors | K7938-36 | Pad/Rotor Kit Front+Solid Rear | Pad/Rotor Kit Front+Solid Rear | |
| Complete PowerStop pads/rotors/boots/clips package – Front + Vented Rear Rotors | K8509-36 | Pad/Rotor Kit Front+Vented Rear | Pad/Rotor Kit Front+Vented Rear | |
–––––––––––––––––– Other parts likely needed for the job: –––––––––––––––––– | ||||
Permatex Brake Parts Lubricant | 24112 | 1 | Permatex Brake Lube | Permatex Brake Lube |
| Brake Fluid | 601458 | 1 | Valvoline Brake Fluid | Wagner Brake Fluid |
| Crush Washers - Crown Automotive | 6502114 | 8 | Crown Brake Hose Washer | Crown Brake Hose Washer |
| Threadlocker | 25251 | 1 | Rapid Cure Orange Threadlocker | |
| Tamper Detection Marker - Red | 20241 | 1 | Vibra-TITE Viz-Torque Marker Red | |
| Paint Pen | 2549 | 1 | Testors Enamel Paint Marker | |
–––––––––––––––––– OEM MOPAR Part Numbers for reference: –––––––––––––––––– | ||||
Caliper Adapter | 68456055AA | 2 | | |
| Caliper Assembly - Left | 68383241AA | 1 | | |
| Caliper Assembly - Right | 68383240AA | 1 | | |
| Rotor | 68250087AB | 2 | | |
| Pad Kit | 68456066AA | 1 | | |
| Slider Pin Kit | 68456054AA | 2 | | |
| Banjo Bolt | 6512427AA | 2 | | |
| Copper Washer - Line to Caliper | 6502114 | 4 | | |
JL Big Rear Brake Parts with Solid 13.46" Rear Rotors:
Here's the part numbers for everything you'll need to do the rear solid rotor brake upgrade:
Rear JLUR-HD (13.46" solid rotors) | P/N: | Qty | Amazon | Summit Racing |
| –––––––––––––––––– Pick one based on your install needs: –––––––––––––––––– | ||||
| PowerStop pads/rotors/boots/clips package – Solid Rotors - Rear Only | K7942-36 | Pad/Rotor Kit Solid Rear Only | Pad/Rotor Kit Solid Rear Only | |
| Complete PowerStop pads/rotors/boots/clips package – Front + Solid Rear Rotors | K7938-36 | Pad/Rotor Kit Front+Solid Rear | Pad/Rotor Kit Front+Solid Rear | |
–––––––––––––––––– Other parts likely needed for the job: –––––––––––––––––– | ||||
Permatex Brake Parts Lubricant | 24112 | 1 | Permatex Brake Lube | Permatex Brake Lube |
| Brake Fluid | 601458 | 1 | Valvoline Brake Fluid | Wagner Brake Fluid |
| Crush Washers - Crown Automotive | 6502114 | 8 | Crown Brake Hose Washer | Crown Brake Hose Washer |
| Threadlocker | 25251 | 1 | Rapid Cure Orange Threadlocker | |
| Tamper Detection Marker - Red | 20241 | 1 | Vibra-TITE Viz-Torque Marker Red | |
–––––––––––––––––– OEM MOPAR Part Numbers for reference: –––––––––––––––––– | ||||
Caliper Adapter - Left | 68385511AA | 1 | | |
| Caliper Adapter - Right | 68385516AA | 1 | | |
| Caliper Assembly - Left | 68385515AA | 1 | | |
| Caliper Assembly - Right | 68385514AA | 1 | | |
| Rotor | 68249592AC | 2 | | |
| Pad Kit | 68386838AD | 1 | | |
| Pin Kit | 68385240AA | 2 | | |
| Banjo Bolt | 6512427AA | 2 | | |
| Copper Washer - Line to Caliper | 6512427AA | 4 | | |
JT Big Rear Brake Parts w/Vented 13.58" Rear Rotors (Like we installed)
Here's the part numbers for everything you'll need to do the rear vented rotor brake upgrade:
Rear JT: (13.58" Vented rotors) | P/N: | Qty | Amazon | Summit Racing |
–––––––––––––––––– Pick one based on your install needs: –––––––––––––––––– | ||||
| PowerStop pads/rotors/boots/clips package – Vented Rotors - Rear Only | K8490-36 | Pad/Rotor Kit Vented Rear Only | Pad/Rotor Kit Vented Rear Only | |
| Complete PowerStop pads/rotors/boots/clips package – Front + Vented Rear Rotors | K8509-36 | Pad/Rotor Kit Front+Vented Rear | Pad/Rotor Kit Front+Vented Rear | |
–––––––––––––––––– Other parts likely needed for the job: –––––––––––––––––– | ||||
Permatex Brake Parts Lubricant | 24112 | 1 | Permatex Brake Lube | Permatex Brake Lube |
| Brake Fluid | 601458 | 1 | Valvoline Brake Fluid | Wagner Brake Fluid |
| Crush Washers - Crown Automotive | 6502114 | 8 | Crown Brake Hose Washer | Crown Brake Hose Washer |
| Threadlocker | 25251 | 1 | Rapid Cure Orange Threadlocker | |
| Tamper Detection Marker - Red | 20241 | 1 | Vibra-TITE Viz-Torque Marker Red | |
–––––––––––––––––– OEM MOPAR Part Numbers for reference: –––––––––––––––––– | ||||
Caliper Adapter | 68376747AB | 2 | ||
| Caliper Assembly - Left | 68376743AA | 1 | | |
| Caliper Assembly - Right | 68376742AA | 1 | | |
| Rotor | 68321348AC | 2 | | |
| Pad Kit | 68376749AD | 1 | | |
| Pin Kit | 68376748AA | 2 | | |
| Banjo Bolt | 6512427AA | 2 | | |
| Copper Washer - Line to Caliper | 6502114 | 4 | | |
How We Like This JT Big Brake Setup
We've only had this setup on the Jeep since July 5, 2026, but we have done numerous abusive stops with it. I really like how the brake pedal is a little bit taller than it was with the Teraflex big brake kit we removed, and there was no loss in stopping power with the smaller front pistons. I think this is most likely due to the much larger pads up front. I had a little bit of concern the rear might want to lock up before the front with how big that upgrade is, but the ABS seemed to control locking both front and rear as needed, and it does not seem the rear bias was too much. This makes sense as our Jeep is rather heavy, and the 4XE uses this exact same brake package - an indication the engineers who designed it found this front/rear bias ratio to be correct on a heavy Wrangler.
I'll come back here in the future to share how this setup performs long-term once we have more serious miles and abuse on them, but until then, I'm very happy with the JT Gladiator brakes on our JK.
Final Thoughts
To be transparent as possible, I want to add that we bought all these parts at full retail from various suppliers, and used on Facebook Marketplace. Also, we will earn some commission if you buy through one of our provided links. If you found this information useful, and want to help us out, click a link on this page to shop and we'll earn a couple percent. This does not affect the price you pay, and we greatly appreciate it! In fact, any shopping through our affiliate links, like this one to Amazon.com, and this one for Summit Racing, works the same way. For the full affiliate disclosure and vendor list, click here. I wish you the best of luck with your project - Thanks for visiting!

0 comments